
Choosing a Cabinet For Flammables is a safety decision, not merely a purchasing task. The right cabinet must match the liquids, container sizes, workplace conditions, and daily handling habits. A bright yellow cabinet may look reassuring. Appearance alone proves little.
NFPA’s report on U.S. industrial and manufacturing fires estimated 37,910 incidents annually from 2017 through 2021. These fires caused approximately $1.2 billion in direct property damage. OSHA 29 CFR 1910.106 also limits stored quantities and specifies requirements for approved storage cabinets. NFPA 30 and FM Global Data Sheet 7-88 add practical guidance on separation, ventilation, ignition control, and fire resistance. These documents should guide selection. Product brochures should not replace them.
James Reason, a respected safety researcher, wrote, “We cannot change the human condition, but we can change the conditions under which humans work.” That principle applies directly here. A reliable cabinet should support safer decisions when workers are rushed, tired, or distracted. Check its construction, self-closing doors, adjustable shelves, spill containment, labeling, and certification. Confirm compatibility with the stored liquids. Do not assume one cabinet fits every facility.
Small details matter. A leaking bottle on a steel shelf can change the risk quickly. Poor placement can block an exit or expose containers to heat. I may be overemphasizing hardware, because human behavior still controls daily risk. Yet the cabinet remains an important barrier. This guide explains how to evaluate capacity, construction, placement, compliance, and long-term usability before purchase.
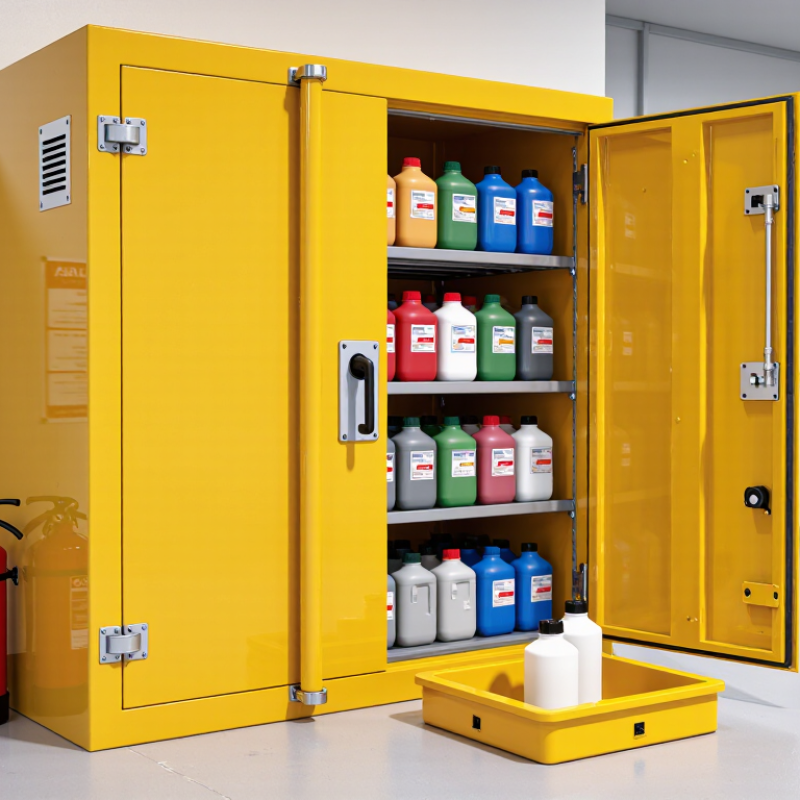
Before choosing a cabinet, identify every flammable material by reading its Safety Data Sheet. Section 2 shows hazards, while Section 9 usually lists flash point, boiling point, and physical state. Section 10 can reveal dangerous incompatibilities. NFPA 30 classifies flammable liquids by flash point and boiling point, not by product name alone. A solvent with a flash point below room temperature needs more careful control than a higher-flash-point coating.
Storage quantity also matters. OSHA 29 CFR 1910.106 permits up to 60 gallons of Class I and Class II liquids in one cabinet, with up to 120 gallons of Class III liquids. These limits are easy to overlook. The cabinet should be steel, double-walled, self-closing, and fitted with a liquid-tight raised sill. Check the cabinet’s certification and your local fire authority’s requirements. A cabinet may look suitable yet fail because the material, quantity, or ventilation plan is wrong.
Tips: Keep incompatible chemicals in separate cabinets. Do not store oxidizers beside flammables. Record the largest container size and total volume before buying. Inspect labels, door alignment, shelves, and corrosion each month. I have found that the most common mistake is choosing by appearance. It feels practical, but the SDS should decide. Recheck the decision when a new liquid arrives.
How to Choose a Cabinet for Flammables?
Start with capacity, not appearance. OSHA 29 CFR 1910.106 limits a cabinet to 60 gallons of Class I, II, and III liquids, with no more than 120 gallons total under specified conditions. Check the liquid’s safety data sheet and classification before measuring storage space. A cabinet that looks half-empty may already exceed its permitted load. Keep containers upright, sealed, and easy to inspect. Do not treat maximum capacity as a daily target.
Construction matters during routine use and emergencies. Choose a cabinet made from substantial steel, with reinforced doors, secure latching, adjustable shelves, and a leak-retaining bottom. Shelves should remain stable under the intended load. Vent connections need careful review; unnecessary ventilation openings can weaken fire protection. I would not assume that thicker metal alone means better performance. Design details matter more than visual weight.
Fire resistance should be documented, not guessed. NFPA 30 provides widely used guidance for flammable-liquid storage, while recognized testing standards assess cabinet performance during fire exposure. European testing under EN 14470-1 commonly identifies 30-, 60-, 90-, or 120-minute protection classes. Select a rating based on the room layout, inventory, fire risk assessment, and local authority requirements. NFPA reports approximately 37,910 industrial and manufacturing fires annually from 2017 to 2021, with about 1.2 billion dollars in direct property damage. These figures are broad, but they challenge a common assumption: a small cabinet does not create a small risk.
Assess cabinet capacity, steel construction, and fire-resistance documentation before selecting a cabinet.
Common nominal cabinet capacities include 4, 12, 30, 45, and 60 US gallons. Under OSHA workplace rules, a cabinet may hold up to 60 gallons of Class I, II, or IIIA flammable and combustible liquids.
OSHA construction criteria include at least 18-gauge steel, double walls with a 1.5-inch air space, a raised sill, and doors that close and latch securely.
Steel thickness alone does not establish a fire-resistance rating. Verify the cabinet’s independent listing, test standard, fire-exposure rating, and local-code requirements.
The chart shows representative nominal capacities; actual cabinet dimensions and permitted storage quantities depend on the applicable safety standard and jurisdiction.
Cabinet location deserves attention before cabinet color or capacity. Place it on a stable, level surface, away from ignition sources, heat, exits, stairways, and busy aisles. Keep doors fully accessible. A cabinet beside a welding area is a poor choice, even if the distance looks acceptable. Check the Safety Data Sheets and ask your site’s safety professional to review the layout.
Ventilation requires careful judgment. OSHA 29 CFR 1910.106 states that flammable-liquid storage rooms should provide at least six air changes per hour. That requirement applies to storage rooms, not automatically to every cabinet. NFPA 30 generally does not require cabinet vents. If vents are installed, they should connect to a properly designed exhaust system, not discharge into the workroom. Improvised ducting can spread vapors or weaken fire protection.
Keep it simple.
NFPA 30 also identifies 60 gallons as the maximum quantity commonly permitted in one approved cabinet, subject to liquid classification and local rules. Do not treat that number as a universal allowance. Cabinet capacity, container condition, room design, and occupancy limits still matter. In practice, I have seen ventilation decisions made from habit rather than a documented hazard assessment. That is a weakness worth correcting. Record airflow tests, inspection dates, and the reason for the cabinet’s location. A qualified safety engineer or authority having jurisdiction should confirm the final arrangement before use.
A suitable flammable-storage cabinet should show clear safety features before installation. Look for double-wall steel construction, secure adjustable shelves, and doors that close and latch without force. Some models include self-closing doors, which can reduce exposure during a fire. Check the cabinet’s capacity, ventilation guidance, and load rating against your actual containers. A cabinet that is too small may encourage unsafe stacking. That mistake is easy to make.
Compliance labels deserve careful attention. Confirm that the markings are permanent, readable, and linked to a recognized safety standard in your region. Do not rely on vague claims such as “fire safe.” Ask for test information and installation instructions from the supplier. Review the safety data sheets for each liquid, because storage needs can vary. Local fire authorities or workplace safety professionals can help verify requirements. Rules are not identical everywhere.
Tips: Keep containers closed and upright. Leave space for inspection. Use a spill tray or built-in sump that can contain leaks without overflow. Check seams, shelves, and door alignment during routine inspections. If liquids are transferred, follow approved bonding and grounding procedures. Record inspection dates. Small details matter. It is also worth questioning whether the cabinet’s location is suitable; a compliant cabinet can still create risk near heat, exits, or busy walkways.
How to Choose a Cabinet for Flammables?
A flammable storage cabinet is only effective when its daily use is planned carefully. Choose a cabinet sized for the actual inventory, with enough space to read labels and remove containers safely. Keep it away from ignition sources, busy walkways, exits, and heat-producing equipment. The surrounding floor should be stable, clear, and easy to clean.
Use the cabinet for compatible flammable liquids only. Never treat it as general storage. Separate incompatible chemicals according to their safety data sheets and site procedures. Keep containers closed when not in use, and avoid overfilling shelves. A simple inventory list should record the product name, quantity, storage date, and responsible person. Small details matter.
Inspection should be practical and consistent. Check the doors, hinges, latch, shelves, warning labels, and cabinet surface. Look for corrosion, dents, leaks, unusual odors, or containers that feel swollen. A clean cabinet can still hide a problem. Schedule documented inspections at a frequency required by local regulations, workplace procedures, and the cabinet manufacturer’s instructions. Record each finding, including “no defect found.” That note creates accountability.
Maintenance also needs clear ownership. Remove damaged containers through an approved process, never by informal disposal. Keep absorbent materials nearby, but do not store unnecessary supplies inside the cabinet. Review staff training after spills, near misses, or changes in inventory. It is easy to postpone inspections during busy shifts. That is where routines can fail. Regular review may reveal that the original cabinet location no longer fits the work area.
| Planning or Maintenance Dimension | What to Confirm | Recommended Action | Suggested Timing or Trigger | Record to Keep |
|---|---|---|---|---|
| Chemical Classification | Verify that the liquids are classified as flammable or combustible under the applicable local fire and workplace-safety requirements. | Review the current Safety Data Sheet for flash point, storage conditions, incompatibilities, and container requirements before selecting the cabinet. | Before purchase, relocation, or adding a new chemical. | Chemical inventory and current Safety Data Sheets. |
| Required Capacity | Estimate the maximum volume needed for routine operations, including replacement stock and waste containers. | Choose a cabinet that provides sufficient usable capacity without overloading shelves. Confirm the permitted quantity for the room and building. | During layout planning and whenever inventory changes. | Capacity calculation and approval documentation. |
| Cabinet Construction | Check the cabinet’s construction, doors, shelves, sump or spill-control features, labeling, and applicable fire-safety listing or certification. | Select a purpose-built flammable-liquid storage cabinet suitable for the chemicals and container sizes being stored. | Before installation and after any significant damage. | Installation checklist, product documentation, and inspection photos. |
| Location and Access | Ensure the cabinet is away from ignition sources, protected from vehicle impact, and not obstructing exits, aisles, emergency equipment, or ventilation routes. | Use a stable, level location with controlled access and clear identification. Follow local separation and quantity rules. | At installation and during workplace layout changes. | Location approval and area inspection record. |
| Compatibility and Segregation | Identify incompatible materials such as oxidizers, acids, bases, and reactive chemicals. | Store only compatible flammable liquids together and use separate approved storage for incompatible chemical groups. | Before stocking and whenever a new substance is introduced. | Compatibility review and segregation map. |
| Container Condition | Look for corrosion, swelling, damage, missing labels, loose caps, and evidence of leakage. | Keep containers closed when not in use, upright, properly labeled, and placed on stable shelves. Remove damaged containers under the site’s spill and waste procedure. | At every use and during scheduled inspections. | Container inspection log and corrective-action report. |
| Shelf Loading | Confirm that shelf loading limits are not exceeded and that containers cannot roll, fall, or contact incompatible materials. | Place heavier containers on lower shelves, keep shelves stable, and avoid storing materials on top of the cabinet unless specifically permitted. | During stocking and monthly inspection. | Shelf-load verification and housekeeping checklist. |
| Dispensing and Transfer | Determine whether liquids will be poured, pumped, or transferred from the cabinet. | Use approved transfer equipment and follow bonding and grounding controls where required to reduce static ignition risk. Keep dispensing containers closed when not actively being filled or used. | For every transfer operation. | Operating procedure, training record, and equipment check. |
| Spill Control | Check the cabinet base, spill-control sump, shelves, and surrounding floor for liquid, residue, or strong chemical odor. | Stop the source when safe, isolate the area, use suitable spill materials, and report the incident according to the emergency plan. | Immediately after a spill or suspected leak. | Incident report, cleanup record, and waste-disposal documentation. |
| Doors, Latches, and Labels | Verify that doors close fully, latches operate correctly, hinges are secure, and warning labels remain visible. | Repair or remove the cabinet from service if the door, latch, frame, or warning label is defective. | Monthly and after impact or unauthorized modification. | Inspection checklist and repair order. |
| Fire Protection and Emergency Access | Confirm that fire extinguishers, alarms, emergency exits, eyewash stations, and spill kits remain accessible. | Keep emergency routes clear and ensure workers know the location of the cabinet, spill kit, alarm points, and emergency procedures. | During routine area inspections and emergency drills. | Emergency-equipment inspection and drill records. |
| Inventory Control | Compare the physical inventory with the approved list and identify expired, unused, or excess chemicals. | Apply first-in, first-out stock rotation where appropriate and dispose of unwanted chemicals through an authorized waste process. | Monthly or quarterly, depending on inventory turnover. | Inventory reconciliation and disposal manifest. |
| Training and Authorization | Confirm that users understand chemical hazards, cabinet rules, spill response, personal protective equipment, and transfer procedures. | Limit access to trained personnel and refresh training after incidents, process changes, or observed unsafe practices. | Before authorization and at the interval required by the site program. | Training attendance, competency assessment, and authorization list. |
| Periodic Management Review | Review inspection findings, spills, near misses, inventory growth, and changes to applicable regulations or processes. | Update the storage plan, cabinet location, procedures, training, and emergency controls as necessary. | At least annually and after a significant incident or process change. | Annual review report and action-tracking log. |
Note: Storage quantities, cabinet construction, ventilation, separation distances, inspection intervals, and fire-protection requirements may vary by jurisdiction and chemical classification. Always verify the applicable fire code, workplace-safety requirements, building rules, and Safety Data Sheets before finalizing the storage plan.
Read each Safety Data Sheet. Check hazard information, flash point, boiling point, physical state, and incompatibilities. Product names can mislead.
Common limits allow up to 60 gallons for certain lower-class liquids and 120 gallons for some higher-class liquids. Local rules may differ.
Choose double-wall steel construction, secure shelves, a self-closing door, and a raised liquid-tight sill. Certification must be verifiable.
Use a level surface away from heat, sparks, exits, stairs, and busy aisles. Keep the door fully accessible.
Not automatically. Storage rooms may require regular air changes, while cabinets often do not. Never install improvised ducting.
Connect vents only to a properly designed exhaust system. Do not discharge vapors into the workroom.
Keep containers closed and upright. Use a spill tray or sump that can hold leaks without overflowing.
Inspect it monthly. Check labels, corrosion, shelves, seams, door alignment, and latches. Record the inspection date.
Yes. Capacity, material, location, ventilation, and liquid compatibility may be wrong. Appearance is a weak decision tool.
Ask a qualified safety professional or local authority to review the layout, quantities, ventilation, and applicable requirements. Recheck when a new liquid arrives.
Choosing the right Cabinet For Flammables begins with identifying the materials to be stored, including their quantities, container types, and specific storage requirements. Consider a cabinet with sufficient capacity, durable construction, and an appropriate fire-resistance rating for the intended workplace. Its location should be stable, accessible, and away from ignition sources, heat, heavy traffic, and incompatible chemicals. Ventilation should be evaluated carefully to prevent vapor accumulation while maintaining the cabinet’s intended protective function.
Before use, verify that the cabinet includes clear safety labels, secure doors, adjustable shelving, grounding provisions where appropriate, and a built-in spill-retention feature. Establish practical rules for organizing containers, keeping incompatible substances separated, and limiting unnecessary access. Regular inspections should check for corrosion, damaged seals, leaking containers, blocked vents, and clutter. Ongoing maintenance, employee training, accurate inventory records, and prompt replacement of damaged components help ensure reliable protection and responsible storage over time.
